Wednesday, September 8, 2010

Pumpkin Scones: Grain Free, Egg Free, Sugar Free

Hi Guys! Glad to be back after the hectic Labor Day. It seems like everyone I know was born at the beginning of September and I've been to more than my fair share of birthday parties so far this month. More than I can count on one hand. And one of them my own. Yes, I'm a year older. But as far as I'm concerned I'm still 29. And will always be 29.

For my birthday this year I was craving the fall. The cool weather, the smell of pumpkin, and the color orange everywhere. Of course, it's still 90 degrees here but that didn't stop me from attempting these totally luscious Pumpkin Scones.


To call these scones is a bit of a stretch. Scones often have a biscuit-like texture. These came out a bit more soft, almost creamy. And based on their bake time can be more or less moist. Shorter bake time = moister. Longer bake time = drier. I've had them both ways and both are delicious.

Just so you know how delicious, check out this closeup of the moister scones.

Posted by Picasa

Yes, those are chocolate chips you see. I know, I know. Chocolate chips are not SCD legal. But it was my birthday treat. Cut me some slack.

So let's get to it. The recipe, adapted from the Veganomicon.  These scones are completely grain free, egg free, and sugar free.

Ingredients:
3/4 cup of almond flour
3/4 cup of coconut flour
1/2 cup of honey
1 tsp baking soda
1 tsp cinnamon
1/2 tsp ginger
1/2 tsp cardamom
1/8 tsp cloves
1/8 tsp nutmeg
1/2 tsp salt
1/4 cup of butter (can also use margarine)
1/2 cup cashew milk (can also use almond milk, any other nut milk, or cow/goat's milk)
2 tsp ground chia seeds (can also use flaxseed, or 1 whole egg)
3/4 cup pumpkin puree
1/2 cup of chocolate chips (or golden raisins, cranberries, pecans, walnuts etc.)

Instructions:
  • Heat the oven to 350 degrees and line a pan with parchment paper.
  • Mix the flours and spices in a large bowl.  Cut the butter into pieces and mix it into the four mixture until it's crumbly.
  • In a separate bowl mix the ground chia seeds with the almond milk until thickened.  Then add the pumpkin puree and honey and stir until fully combined.
  • Add the wet ingredients to the dry ingredients and mix thoroughly.  The batter will be moist and slightly crumbly.  Add the chocolate chips or other mix in and stir until incorporated.  Be careful not to overmix the dough.
  • Squish the dough together into a large ball and flatten it onto your parchment lined pan.  You want the disc to be about and inch thick.  Then take a sharp knife and cut the dough disc into slices.  This pre-scoring will help when they're finished backing.  Or you can drop the dough onto the pan and make individual rounds.
  • Bake for 15-17 minutes for moister scones.  Bake for 18-20 minutes for drier scones.  Let them cool before you make the final slices.  

Makes 8 large scones depending on shape.

If you give these a try let me know what you think!

Wednesday, September 1, 2010

Food Fail: Coconut Flour Biscuits

I had a wild craving for biscuits this week. Biscuits with butter and jam. Biscuits with bacon and cheese. Lovely light and fluffy biscuits with a crunchy top. So I decided to do a little experiment and see if I could get close to those biscuits I remember using coconut flour.

I've seen other SCD recipes for biscuits. But they just don't get it done. So I improvised and produced this:

Posted by Picasa

The driest, heaviest, grossest biscuit ever!  Or should I say 8 of them.  My improvised recipe was a total fail.  Not enough binding ingredients.  Not enough leavening.  Common problems with coconut flour to be sure.  But still a real disappointment. 

If anyone has any tips, tricks, or recipes to try let me know.  These didn't ease my craving for biscuits at all.  Now I just wonder if I can find a way to use them. . .

Sunday, August 29, 2010

Nuts Online Order and Review

I just got my most recent order from Nuts Online. I know I've mentioned this company in other posts but I've just got to say that I love ordering from them. They've got such a good variety of things that I need for my snaking and baking. Their prices are very competitive and the shipping is lightning fast.

And before you ask, no I'm not being compensated for the review. I just love their stuff.  And it can be hard to find all of things you need to follow the Specific Carbohydrate Diet so I'm trying to share the wealth.  Take a look at what just came in the mail. I think I went a little overboard. Haha!

Posted by Picasa

Mostly what I got this time was nuts. I got roasted pistachios and a variety of raw nuts. Walnuts and Pecans for candying here at home. And almond and cashews to make nut milk. My first batch of cashew milk came out great. I think I'll be making ice cream with it soon. And I also threw in some of their freeze dried fruit for snacking, chia seeds (you all know how I love those), some of their almond meal (which is as finely ground as I've ever seen) and some of their coffee.

Crazy right? I guess it's time to start munching! If you haven't ordered from them before, definitely check them out.

Friday, August 27, 2010

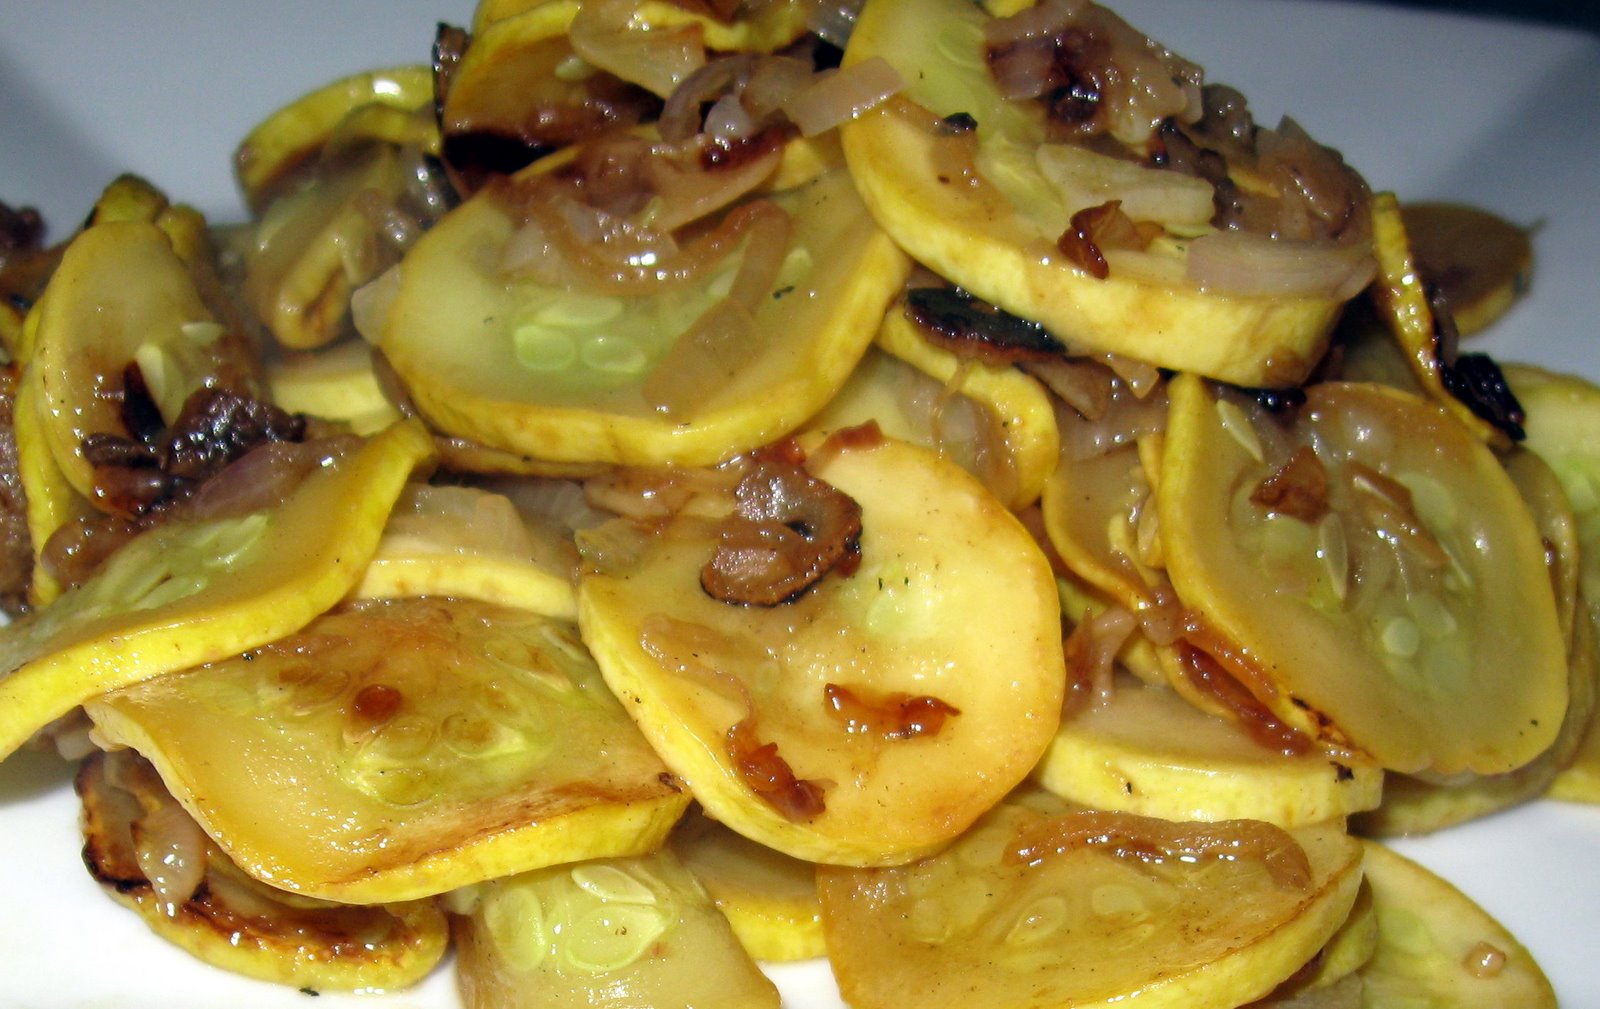
Recipe Review: 101 Cookbooks "Sauteed Zucchini"

I had an opportunity to come across some really pretty yellow squash this week. So I took a chance on a recipe that I've had my eye on from 101 Cookbooks. If you don't read her blog, do so immediately. It's amazing. And her food photography is stunning. The pics alone are enough to make you eat anything she posts about.

I've had squash prepared a number of ways over the years, but somehow I've missed the simple saute. But don't be fooled by this recipe. Though it's simple it doesn't taste simple. It's quite simply amazing.


Admittedly, I made a few mistakes in my own preparation.  For one, I overfilled my pan which resulted in less browning than I would have liked and more steaming.  This is something her recipe warns about so don't make the same mistake I did.  I also omitted the dill, because I didn't have any.  And I omitted the almonds because I just don't like them.  But still the dish was quite possibly the best squash I've ever had.  And certainly the best squash I've ever made myself.

Posted by Picasa

Note that the recipe calls for A LOT of garlic and shallots. So if you don't like those flavors this dish will not appeal to you. I however, love garlic and shallots and this recipe hit that spot hard! It was delicious with chicken and I imagine it would also go great with beef. But I think the flavors might be too strong for something like fish or pork as an accompaniment.

I'll definitely be making this again as soon as I can find more excellent squash. I suggest you do the same.

Wednesday, August 25, 2010

Baked Chicken Legs

I read a lot of food blogs. Always on the lookout for something new to eat. And while baked chicken legs don't qualify as "new", recipes for baked chicken legs have been popping up on a bunch of food blogs lately.

I was particularly inspired by this post at Dine and Dish for Garlic Chicken Legs for the Crockpot.  But it wasn't her recipe that had me curious.  It was her total rave about Chaos in the Kitchen's Baked Chicken Legs.  With a review like that I just had to make them.

I think you'll agree they turned out pretty gorgeous!


I took a bunch of pics because they came out perfectly browned.  I did a very simple baked drumstick.  Salt, pepper, onion powder and garlic powder.  Bake at 475. Nothing to write a cookbook about.  But check them out.


And yes, they tasted as good as they looked.  They are very basic, simple, easy.  And so delicious.  Bonus, they're cheap, too.  I got 5 drumsticks at the store for $1.50.  Probably the least expensive thing I've made in a long time.  And so good I'll be making them again.

Posted by Picasa

So take a lesson from these drumsticks. Simple baked chicken can be an amazing meal. I know I forget that a lot in my search for new flavors. But I guess there's a reason it's a classic.

Monday, August 23, 2010

Best Basic Green Beans

So here's something you don't know about me. I don't love vegetables. I really want to say that I do. But I can't say that and still claim to be a (mostly) honest person. However, eating vegetables makes my body feel better. So I try my best to have a good relationship with them.

Enter the green bean. I can count the number of times I've had a well prepared green bean on one hand. Growing up, my mother used canned green beans which are mushy and salty. My grandmother boiled fresh ones until they looked like green worms. And restaurants barely steam them so that they can't even claim to be cooked and have zero flavor. So for a long time I viewed them as just another veggie that I had to tolerate. Until I tried this recipe. I call it Best Basic Green Beans.

Posted by Picasa

I actually like these. I eat them without that "veggie face" that you see on small children trying lima beans for the first time. They are fresh tasting, slightly crunchy, and made with bacon. Bacon makes everything better, don't you think? Now, if you're a vegetarian or vegan, you can certainly substitute olive oil for the bacon fat in this recipe. And you can really use any frozen veggie you want, if you don't like green beans. Asparagus would be great here as well. I use the frozen veggies because they're really just as good as fresh, available year round, and you don't have to snap them. If you've ever wasted a whole Saturday at Grandma's house snapping beans you totally get the appeal to the frozen.

On to the recipe:

Best Basic Green Beans

1 bag frozen green beans
4 strips uncooked bacon, cut into bite size pieces
2 shallots or 1/2 a yellow onion, sliced, chopped, minced however you like
2 cloves of garlic, minced 
salt and pepper to taste

  • In a medium skillet cook the bacon pieces until just crispy.  Remove the cooked bacon pieces to a paper towel lined dish leaving the bacon fat in the pan.
  • Add the chopped onions and garlic to the pan and cook until softened, or until caramelized if you prefer.
  • Add the bag of frozen green beans to the pan.  Be careful as the oil may spatter when the frozen beans are added.  Stir the beans continuously.  You don't want them to burn.  How long you cook them here is up to you.  If you like them barely cooked and crunchy you'll only cook them a few minutes.  If you like them softer you'll cook them longer.  Add salt and pepper to taste.  Taste the beans as you go to determine their doneness.  
  • When cooked through remove from the heat, toss with the bacon pieces and serve.

Makes 4 servings.

If you give these a try let me know how they come out for you.  Happy eating!

Friday, August 20, 2010

Ugly Pics and Linkies: Friday 8/20/10

Hi Everybody!  If you've read my blog before you'll notice something about me.  I'm not a great food photographer.  Taking beautiful pictures of food is definitely a skill and an art.  I'm working on it but I clearly have a lot of work to do.  What you might not know is that I'm don't take great pictures of other things either.  So in the spirit of fun I thought I'd share some of my more spectacular picture failures.

I feed the birds every morning and thoroughly enjoy watching them.  Yesterday I tried to take a few pictures of what I see every day.

This is a cardinal.


This is a red-headed woodpecker.


'Nuff said about my photography skills.  Haha!

And since it's Friday I thought I'd take some time to put together a few of the things that caught my eye this week.  Click away if you want to check them out.

Food Related:

Other Stuffies: